Portals
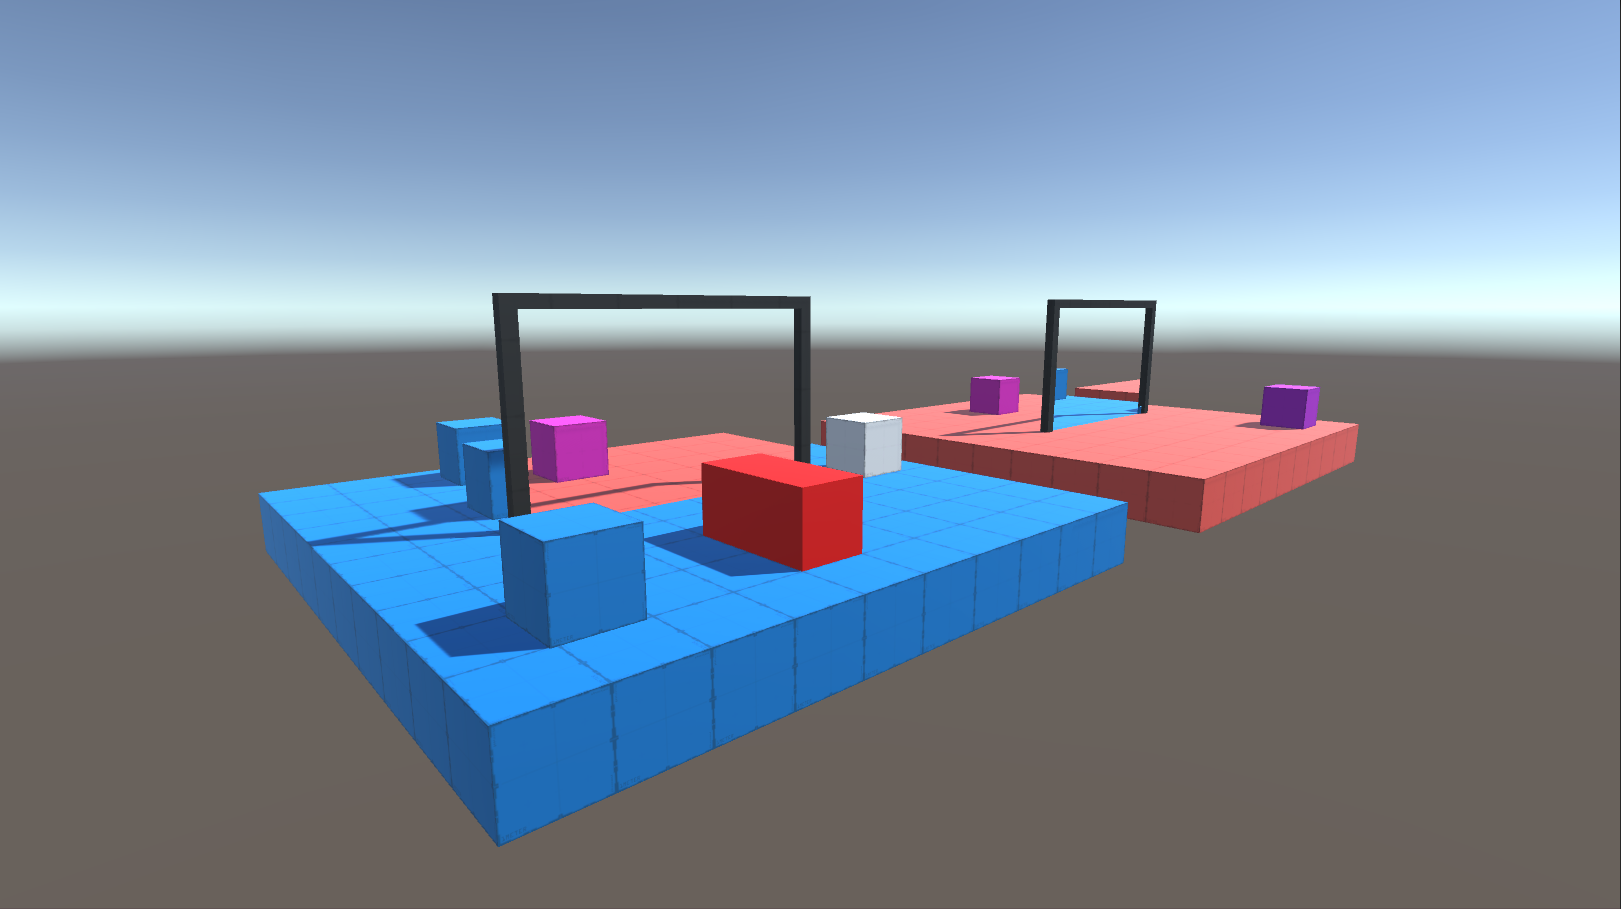
I saw a video on YouTube by Sebastian Lague called Coding Adventure: Portals, I thought the topic was really interesting so I’ve decided to follow along and try to implement my own version of the portals. Computer Graphics and rendering are always a big interest of mine so I wanted to use this opportunity to learn about rendering in general, as well as some Shader coding in Unity. In this article I’ve documented all the steps I did in order to achieve the same portal effects in the video. I will also have a link to my Github repo here: Portals in case anybody wants to check it out.
The Whole Process of Creating Portals
Step 1. Basic Scene Setup
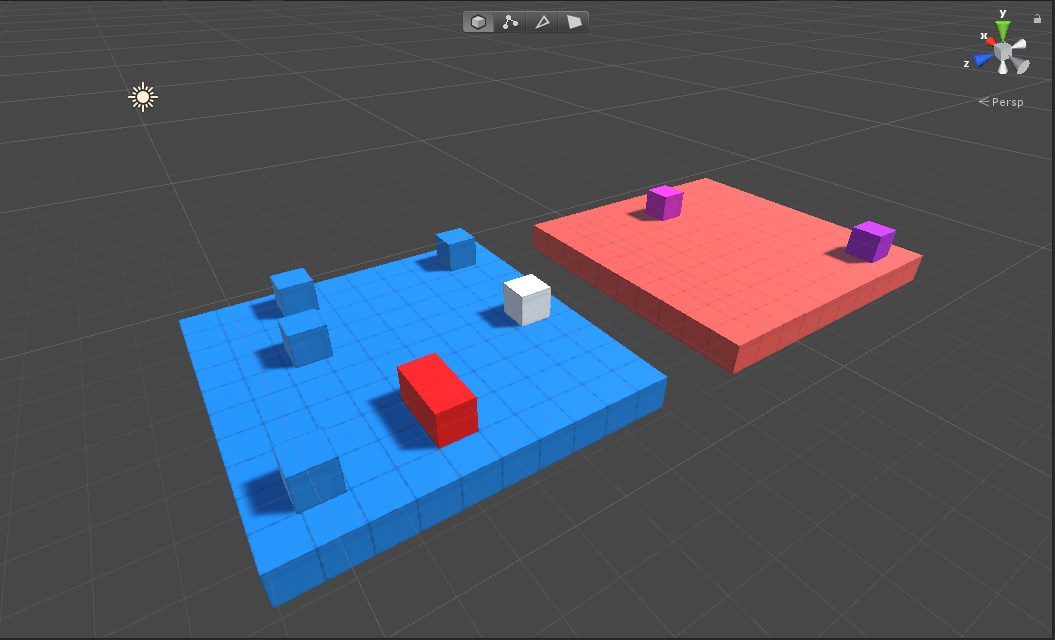
For this simple scene, I created two huge platforms, one in blue and one in red, and some randoms cubes on the platforms so I will know what I’m currently looking at. For the cubes I just used ProBuilder in Unity to quickly create a couple of them.
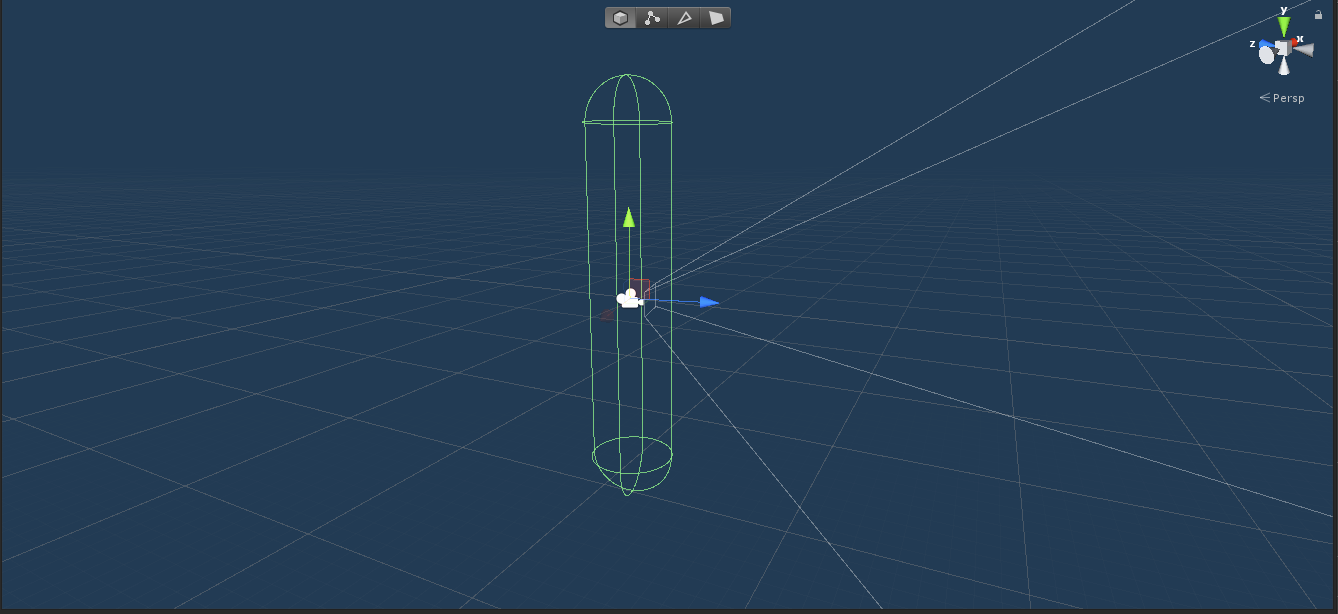
In order for me to move around in the scene, I’ve also created a first-person controller to allow moving and looking around in the scene. It has a Capsule Collider, a Rigidbody and a First Person Character Controller script attached to it. Main camera is attached to this controller as a child so we will be able to control camera movement.
For the FirstPersonCharacterController.cs, I had some very simple code to control the movement and the camera:
    void Update()
    {
        if (Input.GetButtonDown("Jump"))
        {
            rigidbody.AddForce(new Vector3(0, jumpForce, 0));
        }

        var direction = new Vector3(-Input.GetAxis("Mouse Y"), Input.GetAxis("Mouse X"), 0);
        var angles = camera.transform.rotation.eulerAngles;
        angles += direction;
        camera.transform.rotation = Quaternion.Euler(angles);

        var movement = new Vector3(Input.GetAxis("Horizontal"), 0, Input.GetAxis("Vertical"));
        if (movement.magnitude > double.Epsilon)
        {
            var yaw = Quaternion.Euler(new Vector3(0, angles.y, 0));
            movement = yaw * movement;
            rigidbody.velocity = movement * Time.deltaTime * speed + new Vector3(0, rigidbody.velocity.y, 0);
        }
        else
        {
            rigidbody.velocity = new Vector3(0, rigidbody.velocity.y, 0);
        }
    }
The basic setup is done and now we can move and jump in the scene. Now comes the tricky part which is making the portals.
Step 2. Portal Rendering
There are two major functionalities that the portal needs to have: render what the other portal sees onto this portal, and teleporting objects. For this step we are going to try to use some camera tricks to render the portal.

First, I created two portals, one on each platform, in order to see what the other portal sees, I attached a new camera on each portal, this camera will be responsible for rendering the scene from the opposite portal. But instead of rendering the camera to the screen, I wanted the camera to render to the portal.
Target Texture
Unity had a really nice feature of rendering camera to a texture called Target Texture.
PortalCamera.cs:
viewTexture = new RenderTexture(Screen.width, Screen.height, 0);
portalCamera.targetTexture = viewTexture;
Basically if you set the target texture to some texture, this camera will render to this texture. That’s exactly what I wanted. I then assign the texture to the portal’s material so the portal will render what the camera sees.
PortalDisplay.cs:
material = GetComponent<Renderer>().material;
material.SetTexture("_MainTex", viewTexture);
Manual Camera Rendering
In the meantime, I did’t want the portal cameras to render every frame because it is really GPU heavy, I only wanted them to render when the main camera can see the portal, then I can tell the camera to render manually. In order to manually render cameras, I had to disable the camera, and call Render() function explicitly when rendering is needed. Unity documentation briefly mentioned this feature for Render().
PortalCamera.cs:
void Start()
{
    portalCamera.enabled = false;
}

public void Render()
{
    portalCamera.Render();
}
Now we are ready to look at the result:
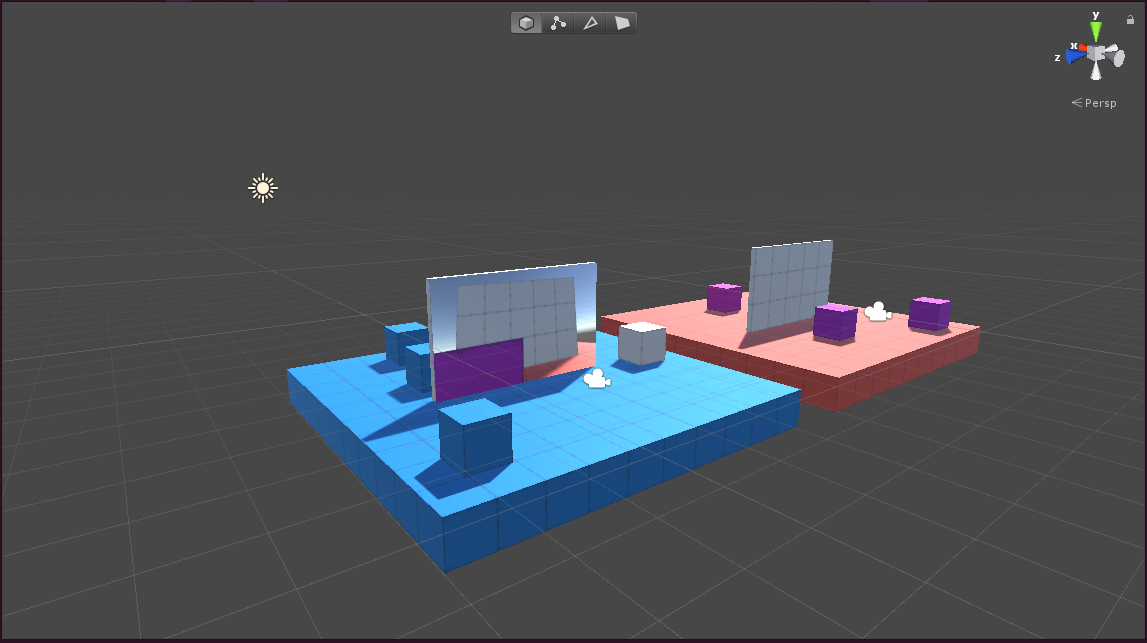
When I tested the results, I found that the portal is rendering everything the portal camera sees. In order to create the proper portal effect, I need to only render the portal part in the texture on to the portal itself.
My first attempt at solving this problem is by setting the UV of the mesh in the PortalDisplay itself. We all know that the texture of the material of the mesh is mapped on to the 3D model by a UV system. For each vertex of the model, there is a UV value that indicate the coordinate of the texture to use. I figured if I set the UV coordinates of the four corners of the portal display quad to be the four corners of the portal in the texture, it will just display the portal portion instead of everything else.
I was on the right track, I could see only the portal being rendered. but for some reason, it had some weird deformation in the middle of the portal, depending on where I’m looking. Also when I’m just looking at part of the portal, the edges looked extremely weird. I got stuck on how I’m able to solve this problem so I sought a little help from Sebastian’s YouTube tutorial.
Basically what we have to do is to create a custom unlit shader, and set the UV within the fragment part of the shader. I created a unlit shader called PortalShader and modified some code in the shader:
    struct v2f
    {
        float4 screenPos : TEXCOORD0;
        float4 vertex : SV_POSITION;
    };
    sampler2D _MainTex;
    float4 _MainTex_ST;
    v2f vert (appdata v)
    {
        v2f o;
        o.vertex = UnityObjectToClipPos(v.vertex);
        o.screenPos = ComputeScreenPos(o.vertex);
        return o;
    }
    fixed4 frag (v2f i) : SV_Target
    {
        float2 screenSpaceUV = i.screenPos.xy / i.screenPos.w;
        return tex2D(_MainTex, screenSpaceUV);
    }
I added a vector called screenPos in v2f struct to keep track of the screen positions of each corner vertex on the portal display mesh. In the vert function, which is the vertex shader, I added o.screenPos = ComputeScreenPos(o.vertex); to pass the screen position info to the fragment shader so we can use that information for texture mapping.
In the fragment shader, I used float2 screenSpaceUV = i.screenPos.xy / i.screenPos.w; to calculate the screen space UV. I’ve done a lot of research on why I have to divide i.screenPos.xy by the W value, and I think based on Unity documentation, UnityObjectToClipPos(float3 vertex) converts the coordinate of a vertex to camera’s homogeneous coordinates, and the W component of the output represent how far away the vertex is from the camera. In order to bring every vertex to the screen plane, we have to divide the XY component by W component to convert everything from 3D to 2D, thus being able to render 3D world on to a 2D screen.

Now we can see that the portals can properly display only the portal part of what the other portal camera sees.
Step 3. Teleport Player
There are two parts to the teleport that we have to implement. One is to teleport the player, where the main camera is attached; the other is to teleport other game objects where the player observes. These two functionalities require different approaches to implement. I first implemented how to teleport the player.
Portal Space Transformation
In order to teleport the player from one portal to the other, I thought of portals as if they have there own local space,
I attached a collider trigger to the portal object, the player object has its own capsule collider. I wanted to teleport the player once the center of the player’s collider passes the middle of the portal. I used the following script to calculate player’s position relative to the source portal, and then teleport the player to the same relative position to the destination portal.
Portal.cs:
private void TransformToTarget(Transform objectTransform)
{
    if (destPortal != null)
    {
        Vector4 position = objectTransform.position;
        position.w = 1.0f;
        var newPosition = destPortal.gameObject.transform.localToWorldMatrix * this.transform.worldToLocalMatrix * position;
        objectTransform.position = newPosition;
        Quaternion rotation = objectTransform.rotation;
        var newRotation = destPortal.gameObject.transform.rotation * Quaternion.Inverse(this.transform.rotation) * rotation;
        otherTransform.rotation = newRotation;
    }
}
This function lives in the source portal and it is called on the transform of the teleporting object.
You can see from the above script that I first transform the world position of the object to the source portal’s local position, and then I use destination portal’s local to world matrix to get the world position of the teleported object. Same thing with the rotation of the object.
Teleport PortalTraveler
I attached a script called PortalTraveler to the player object to allow it to be teleported. What this script does is that it keeps the record of the portal traveler’s last frame’s position. When testing for whether this traveler has past the middle of the portal or not, I simply do a dot product on the vectors of the current position to portal center and the previous position to portal center. If the dot product gives a negative result, that means the player has passed the mid point and we are ready to teleport the player. If not, that means the player just barely entered the portal and back out, we don’t want to teleport the player in that case.
Portal.cs:
private bool CheckTravelerPassPortal(PortalTraveller traveller)
{
    Vector3 forward = transform.forward;
    Vector3 previousVec = traveller.LastFramePosition - transform.position;
    Vector3 currentVec = traveller.transform.position - transform.position;
    float previousSign = Mathf.Sign(Vector3.Dot(previousVec, forward));
    float currentSign = Mathf.Sign(Vector3.Dot(currentVec, forward));
    return previousSign + currentSign == 0;
}
Main Camera View Frustum Issue
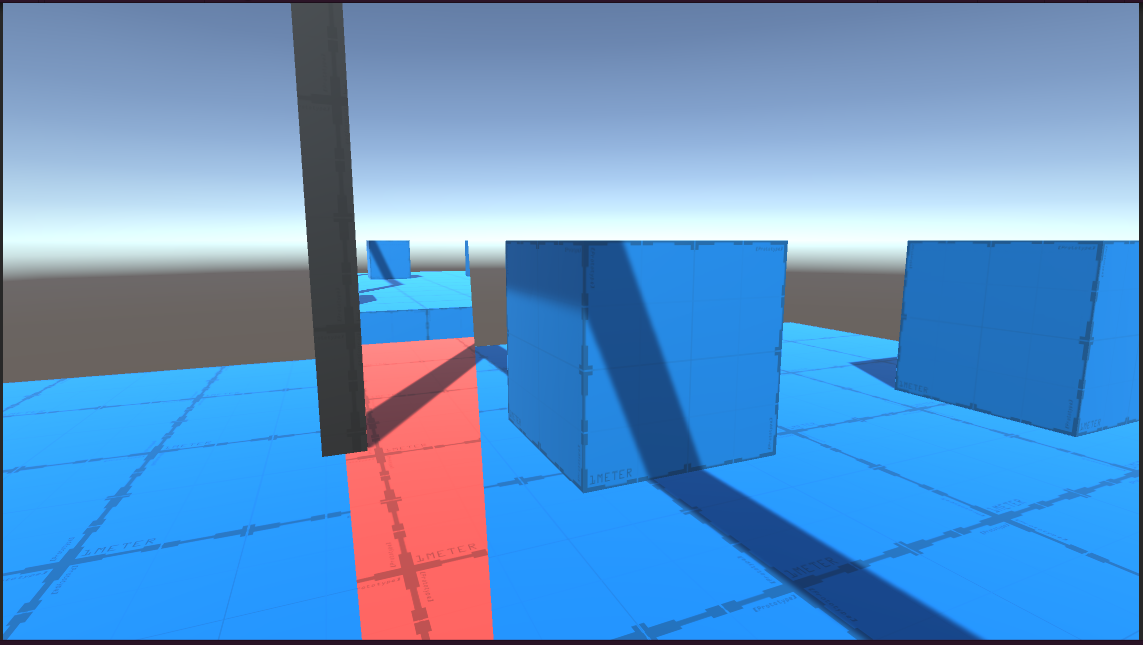
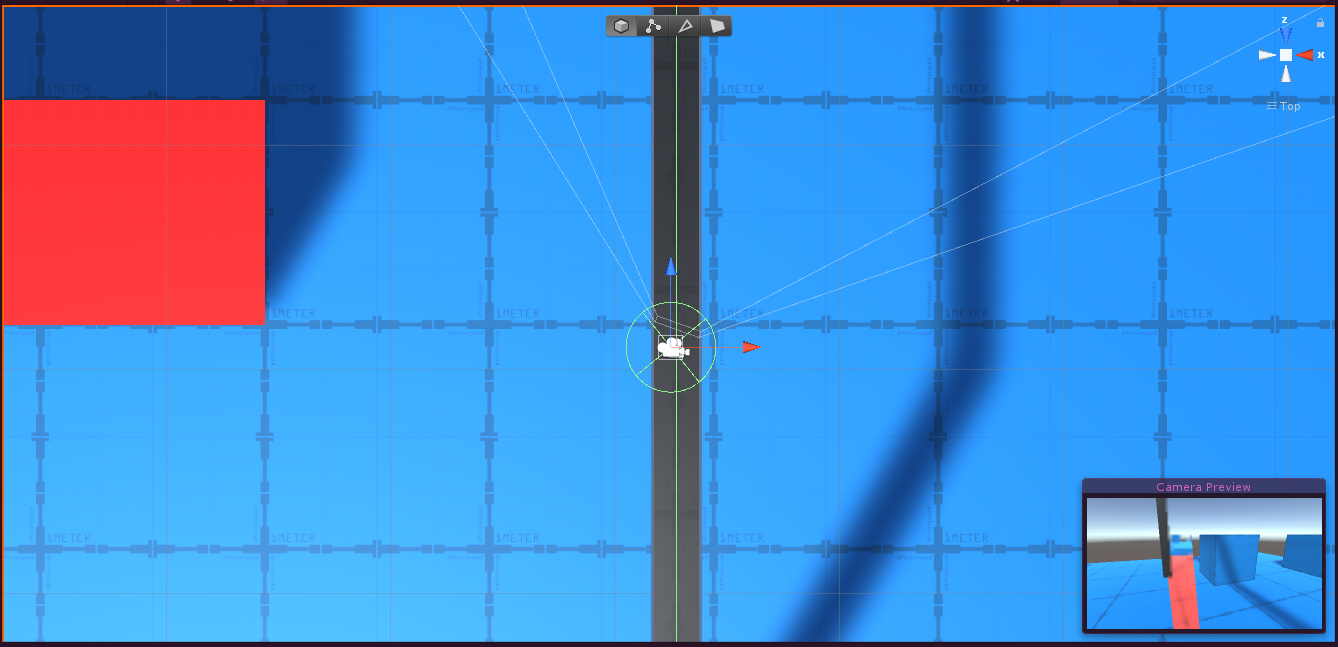
When going through the portal, I found that not only do I see what the portal renders, I could also see through the portal and see the original scene. This is caused by the main camera’s view frustum’s near clip plane intersecting with the portal plane. In the second screenshot, the gray line represents Main Camera’s view frustum. Near the camera there is a gray polygon that represent’s the camera’s near clipping plane. You can see that the polygon intersected with the green vertical line, which is the portal plane. The result is the half split view you see in the first screenshot.
My solution to this problem was to make the portal plane into a flat box. When the player enters the collider of the portal, I would make the box thicker to wrap Main Camera to prevent clipping. See the second screenshot for more details, the extended part from the right of the green line is the extended portal box.
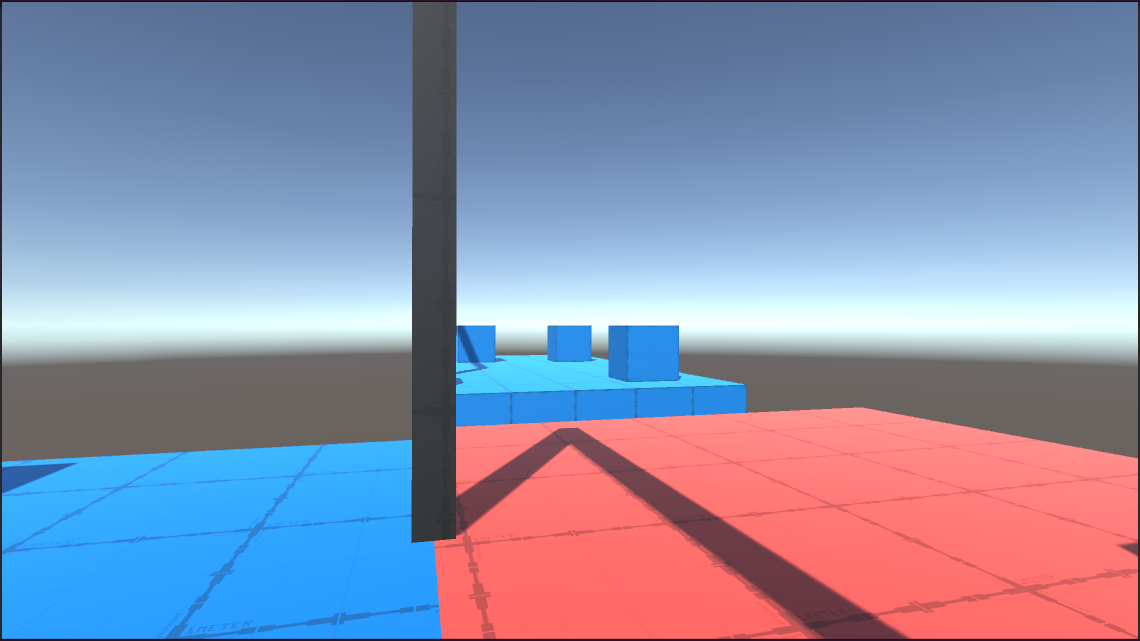
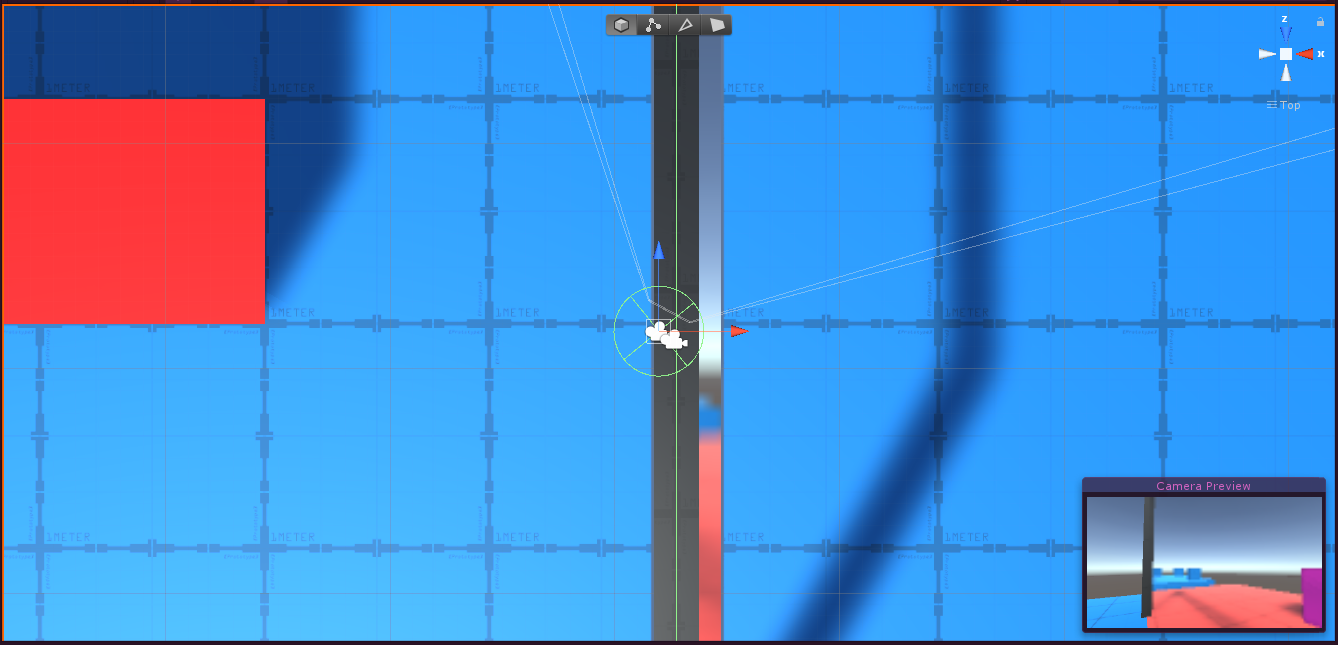
In order to determine which direction the box should be extending, I calculate the dot product of portal’s forward vector and portal center to player vector. I would extend to different directions based on which direction the player entered from.
var playerVecFromPortal = other.transform.position - transform.position;
enteredFromBack = Vector3.Dot(playerVecFromPortal, transform.forward) < 0;
Camera Flickering Issue
The other issue I’ve found was the sometime when the player went through portals, the portal flickers during the teleport.
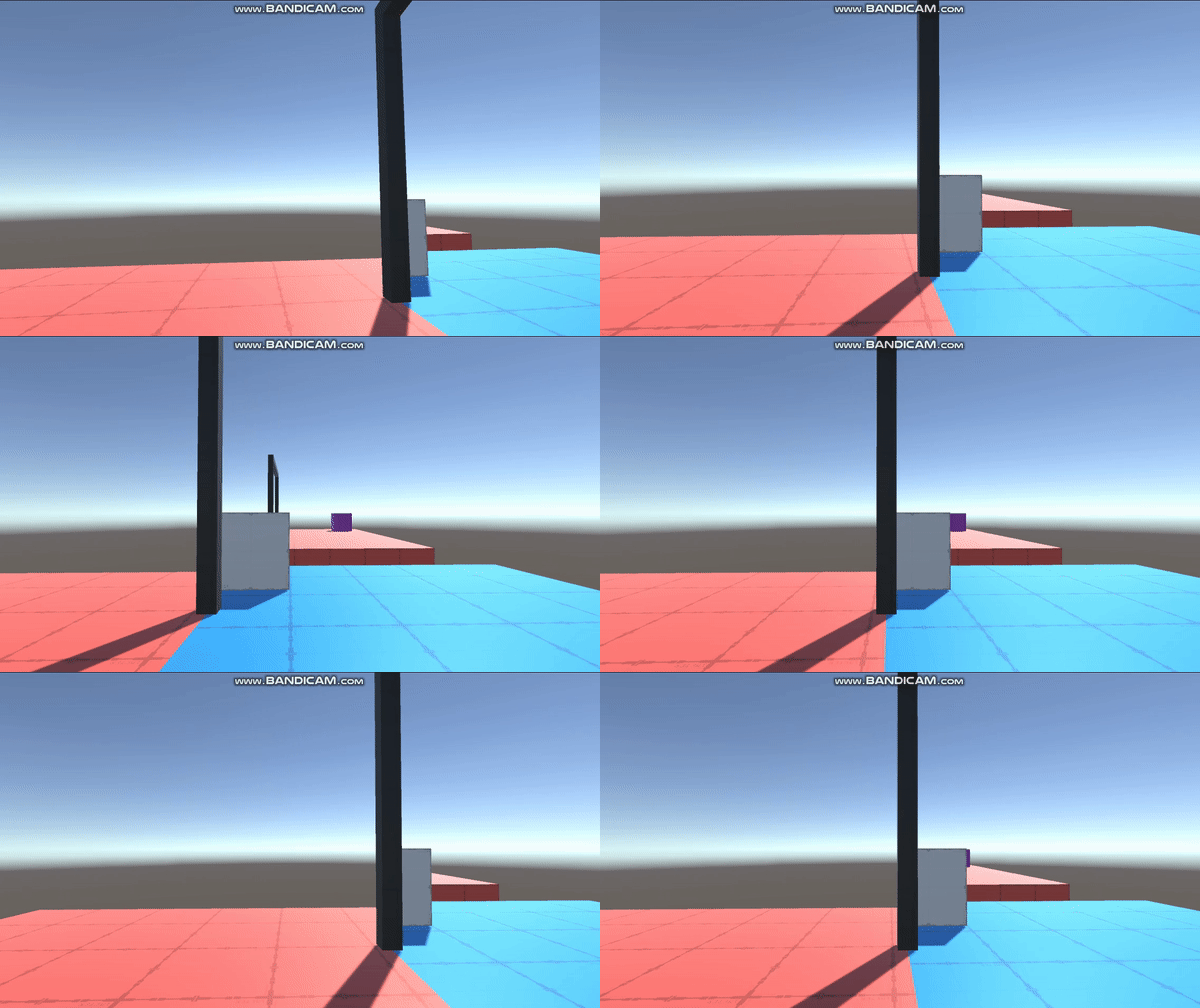
The reason why that is happening is because of the camera rendering order.
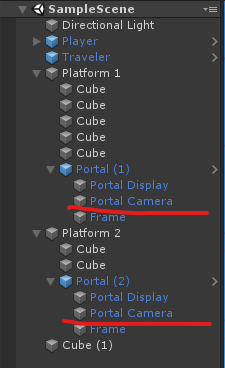
This issue happens when we go through portal 1 and teleported to portal 2. The flicker happens at the frame of teleport. In the hierarchy, portal camera 1 renders before portal camera 2. When the player is teleported to portal 2, portal camera 2 is still rendering at the position before player has been teleported.
The solution to this issue can be solved by forcing portal camera 2 to render the frame with the player’s teleported position, before the player is teleported.
Portal.cs
target.ManuallyRenderCamera(mainCamera.transform.position, mainCamera.transform.rotation);

public void ManuallyRenderCamera(Vector3 position, Quaternion rotation)
{
    targetPortalRenderCamera.transform.position = position;
    targetPortalRenderCamera.transform.rotation = rotation;
    targetPortalRenderCamera.Render();
}
Once I applied this solution the camera flickering issue disappeared.
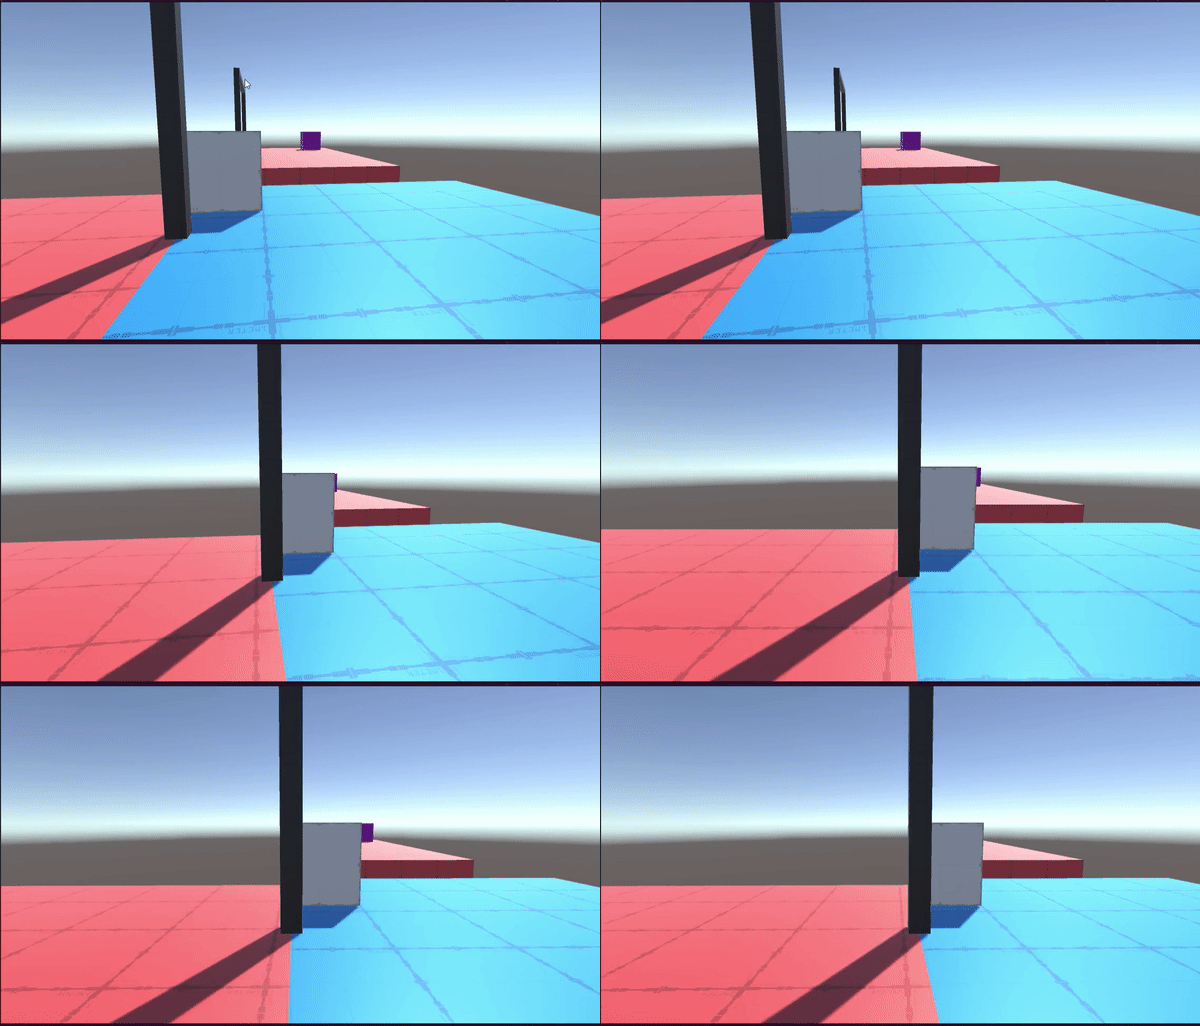
Once this issue is fixed, I have completed the process of teleporting player through portals.
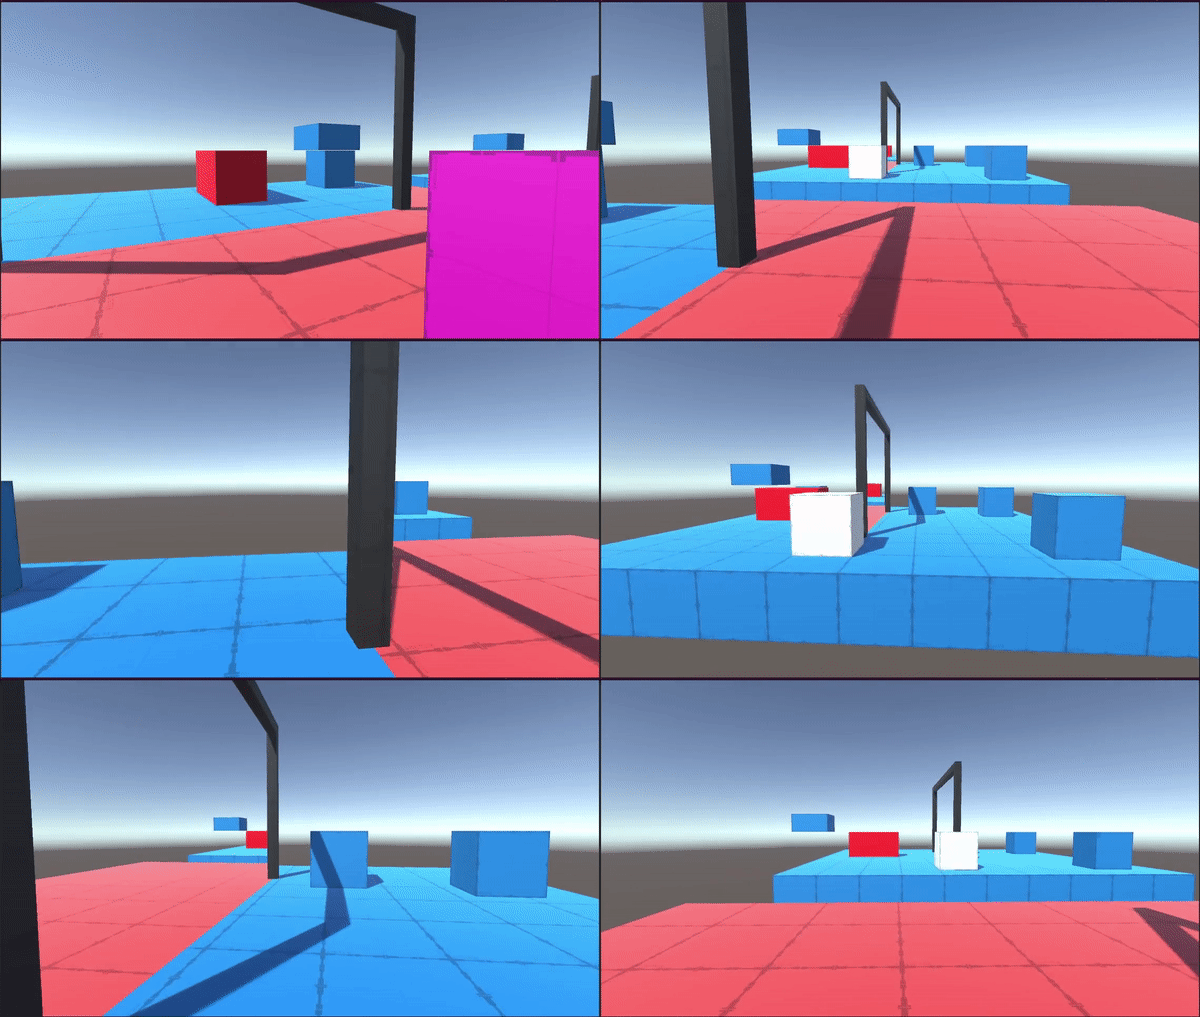
Step 4. Teleport Objects
Now I can successfully teleport the player smoothly and without any flickering issues. But what about observing other objects go through the portal? I found that if the object being teleported is too long, it would look really unnatural because once it passes the midpoint of the portal, it would teleport and disappear from one portal and suddenly appear in the other portal.
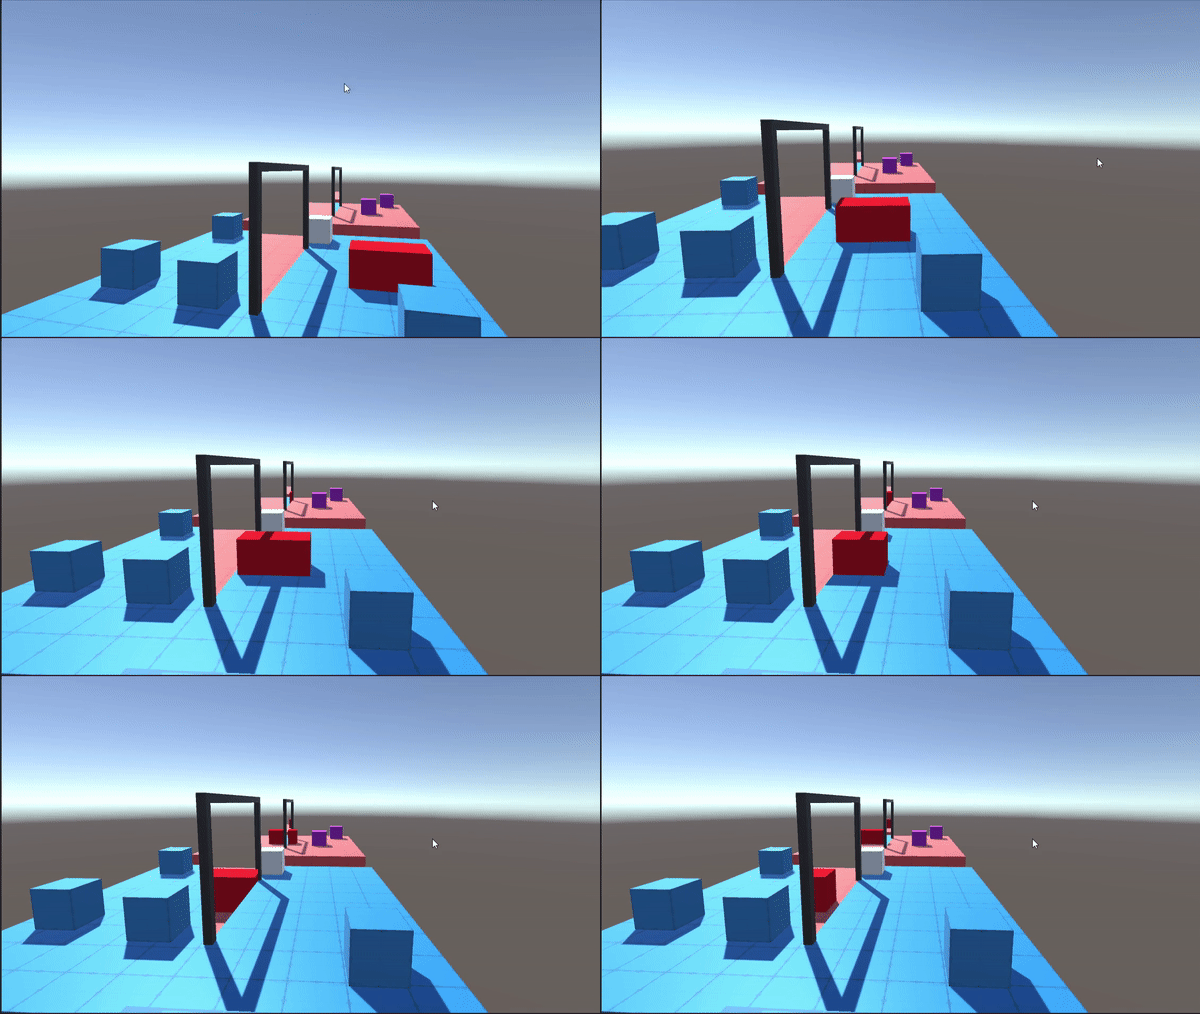
The above example demonstrate the result when teleporting objects using the same method as teleporting players. Obviously I need to use a different approach for teleporting objects.
First, when the object start touching the portal, I need to make a clone of the object at the other portal, moving at the same speed, once the object finished going through the portal, that’s when I actually teleport the original object, and then destroy the clone object.
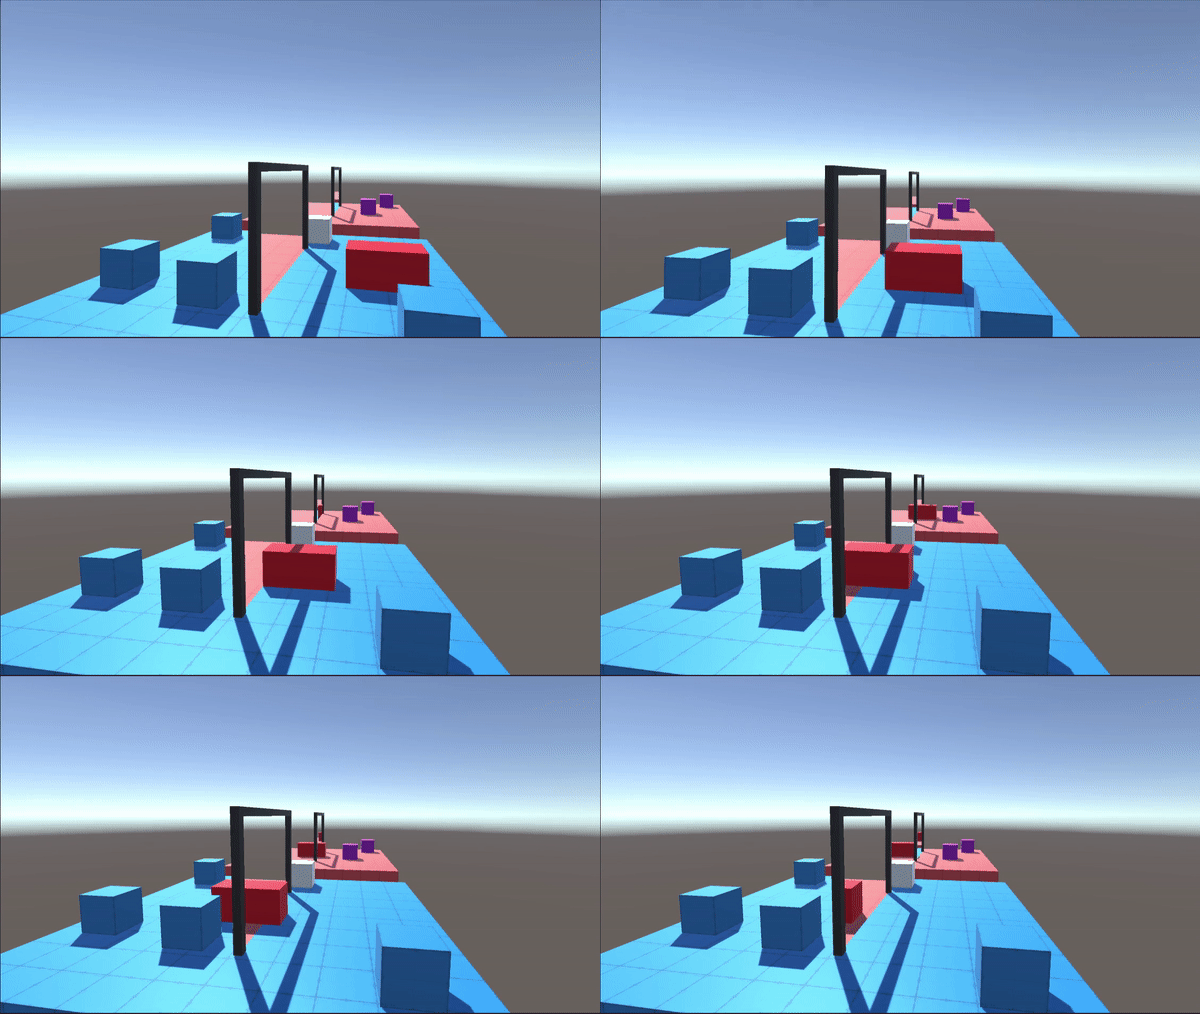
Portal.cs
private void CreateTravelerClone(PortalTraveler portalTraveler)
{
    lstPortalTravelers.Add(portalTraveler);
    TransformToTarget(portalTraveler.transform, out Vector3 newPos, out Quaternion newRot);
    PortalTraveler travelerCopy = Instantiate(portalTraveler, newPos, newRot);
    travelerCopy.enabled = false;
    travelerCopies.Add(portalTraveler, travelerCopy.gameObject);
}
For every frame, recalculate the position and rotation of the clone by checking the transformation of the original object. When the original object exits the portal trigger collider, teleport the object to the target portal and then remove the clone.
Portal.cs
public void OnTriggerExit(Collider other)
{
    PortalTraveler portalTraveler = other.GetComponent<PortalTraveler>();
    if (portalTraveler != null)
    {
        if (other.CompareTag("Player"))
        {
            // Deal with player...
        }
        else
        {
            TransformToTarget(portalTraveler.transform);
            lstPortalTravelers.Remove(portalTraveler);
            DestroyTravelerCopy(portalTraveler);
            travelerCopies.Remove(portalTraveler);
        }
    }
}
The next step is to cut off the part of the object which is already passed the portal. I created another shader called Slice that can discard any pixels that are on the other side of an arbitrary plane. Slice is a surface shader that has a few parameters exposed so I could change them in the script.
Slice.shader
    float3 sliceCentre;
    float3 sliceNormal;
    int isSliceable = 0;
    int flip = 0;
    // Add instancing support for this shader. You need to check 'Enable Instancing' on materials that use the shader.
    // See https://docs.unity3d.com/Manual/GPUInstancing.html for more information about instancing.
    // #pragma instancing_options assumeuniformscaling
    UNITY_INSTANCING_BUFFER_START(Props)
        // put more per-instance properties here
    UNITY_INSTANCING_BUFFER_END(Props)
    void surf (Input IN, inout SurfaceOutputStandard o)
    {
        float sliceSide = lerp(0, dot(sliceNormal, IN.worldPos - sliceCentre), isSliceable);
        sliceSide = lerp(-sliceSide, sliceSide, flip);
        clip (sliceSide);
        // Albedo comes from a texture tinted by color
        fixed4 c = tex2D (_MainTex, IN.uv_MainTex) * _Color;
        o.Albedo = c.rgb;
        // Metallic and smoothness come from slider variables
        o.Metallic = _Metallic;
        o.Smoothness = _Glossiness;
        o.Alpha = c.a;
    }
I passed in the center and normal of the plane into the shader as parameters sliceCentre and sliceNormal and I calculated the dot product between the normal of the plane, and the vector from plane center to the pixel. If the pixel is on the same side as the plane normal, draw the pixel normally, otherwise, clip the pixel using clip() which means not draw the pixel at all. The lerp() functions act as if statements so
float sliceSide = lerp(0, dot(sliceNormal, IN.worldPos - sliceCentre), isSliceable);
is the same as
float sliceSide;
if (isSliceable == 1) {
    sliceSide = dot(sliceNormal, IN.worldPos - sliceCentre);
} else {
    sliceSide = 0;
}
I did some research on why I shouldn’t use if statement in shaders. Not getting into any details, the main reason is the performance. Shaders are ran on GPU and depending on the hardware, if statement can potentially slow down the GPU’s computing performance. Instead, a lerp() function is what GPU is really good at computing.
I used this shader to create a material called Custom_Slice to apply to the object that can be sliced. I also created a script called Sliceable.cs to modify the variables in the shader.

Sliceable.cs
void Start()
{
    mesh = GetComponent<MeshRenderer>();
    material = mesh.material;
    UpdateMaterialSlice();
}

public void UpdateMaterialSlice()
{
    if (material)
    {
        material.SetInt("isSliceable", isSliceable ? 1 : 0);
        material.SetInt("flip", flip ? 1 : 0);
        material.SetVector("sliceCentre", slicePosition);
        material.SetVector("sliceNormal", sliceNormal);
    }
}
I’ve made a simple scene to demonstrate the effect of each variable and how changing them will have different effects on the object itself:
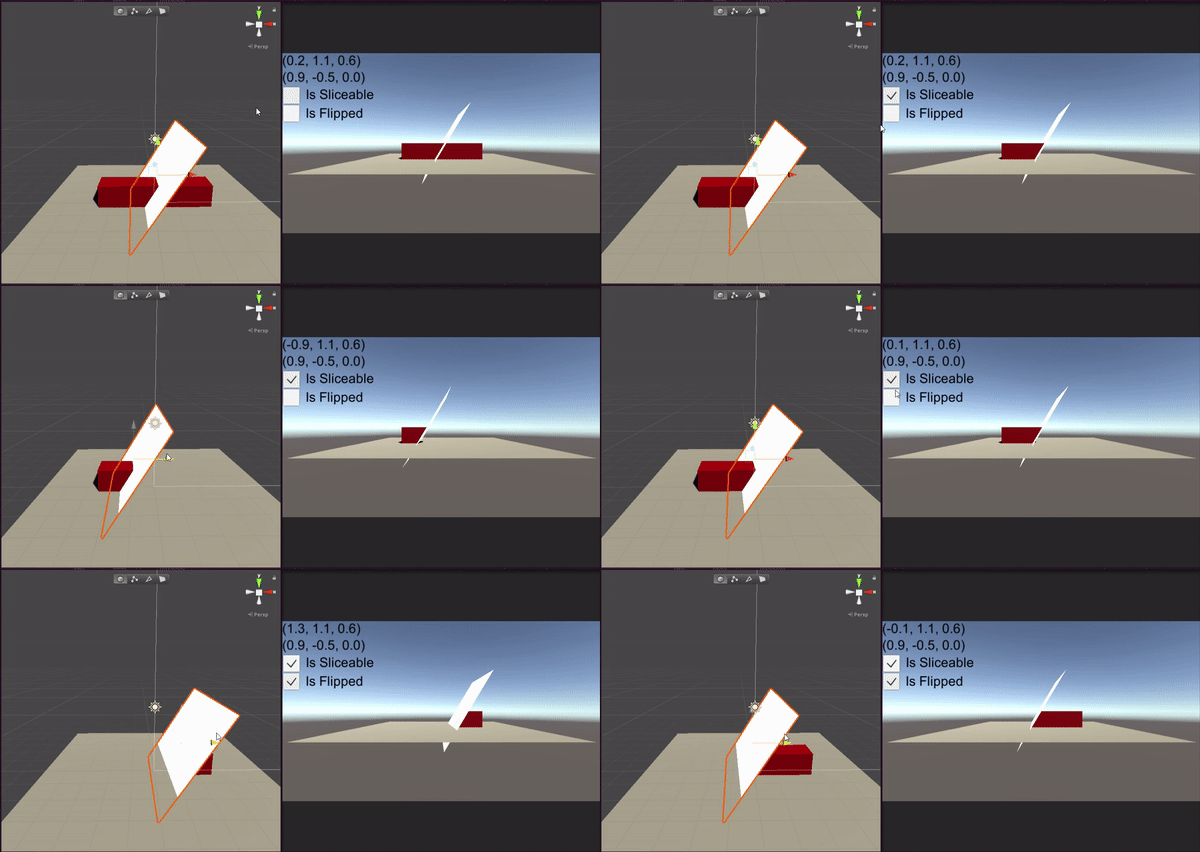
Now that the Sliceable material and script is working, it’s time to incorporate it into the portal scene. All I have to do is to attach Sliceable script and material to the portal traveler object, and set the portal plane to be the slice.
Portal.cs
    private void CreateTravelerClone(PortalTraveler portalTraveler, bool enteredFromBack)
    {
        ...

        Sliceable sliceable = portalTraveler.GetComponent<Sliceable>();
        sliceable.SlicePosition = transform.position;
        sliceable.SliceNormal = transform.forward;
        sliceable.IsSliceable = true;
        sliceable.Flip = !enteredFromBack;
        sliceable.UpdateMaterialSlice();
        if (target)
        {
            sliceable = travelerCopy.GetComponent<Sliceable>();
            sliceable.SlicePosition = target.transform.position;
            sliceable.SliceNormal = target.transform.forward;
            sliceable.IsSliceable = true;
            sliceable.Flip = enteredFromBack;
            sliceable.UpdateMaterialSlice();
        }

        ...
    }
When creating the clone for the traveler, I assigned the target portal plane to the clone’s sliceable material, and then I flipped the direction of the clip so it is clipped from the other side. If I observe it from the top, it would look like this:
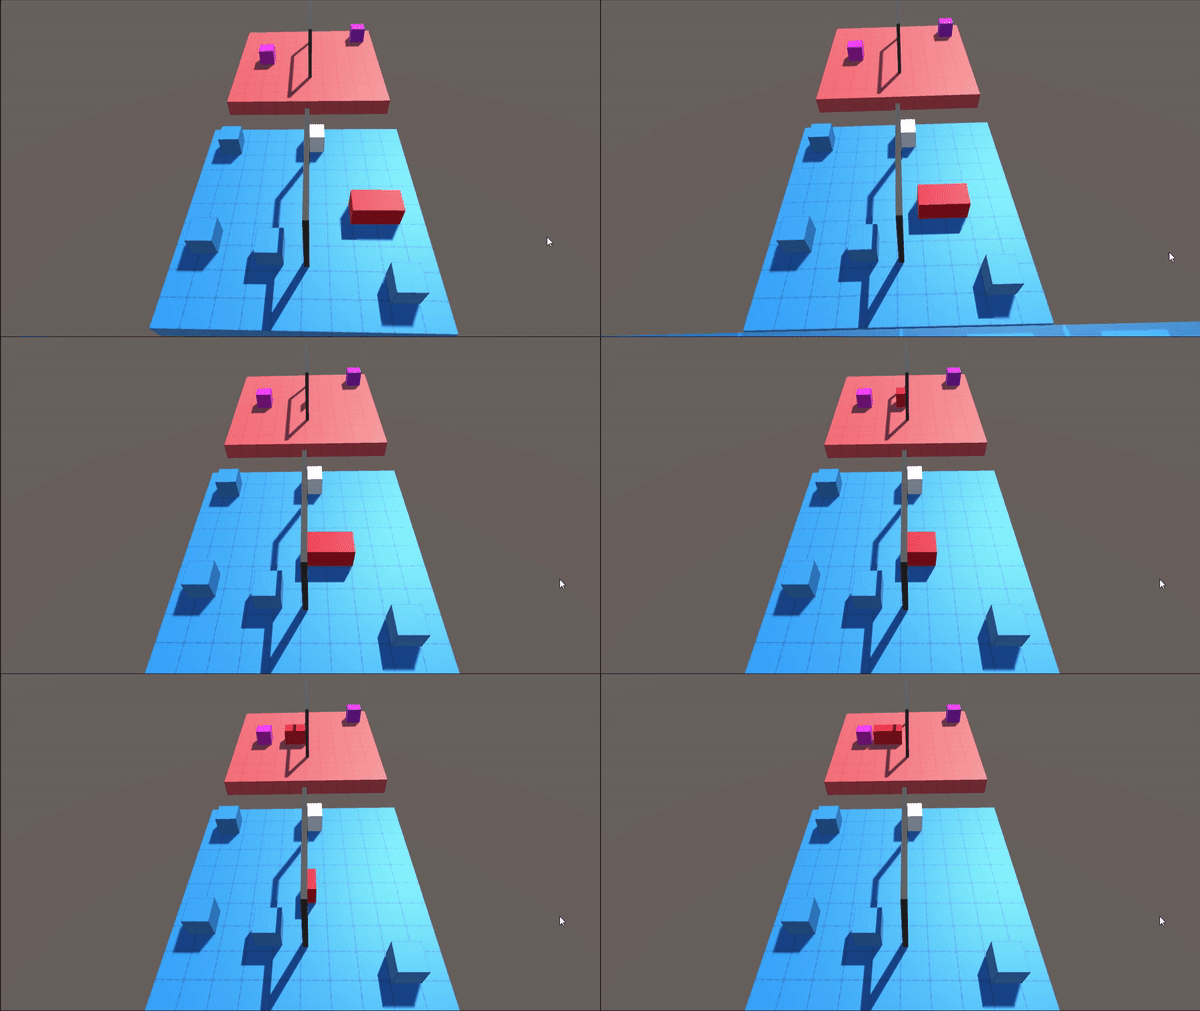
That is looking really nicely! Now the object can go through the portal smoothly.

Nice to Have Features
There are some other features and issues that I am aware of but I didn’t get a chance to look into them.
Recursive Portal Rendering
This effect is achieved when you have two portals facing the same direction and standing next to each other. When the player go through them they look like it is going through an endless tunnel. This feature requires recursive rendering to achieve this effect. Hopefully that in the near future I can try to implement this.
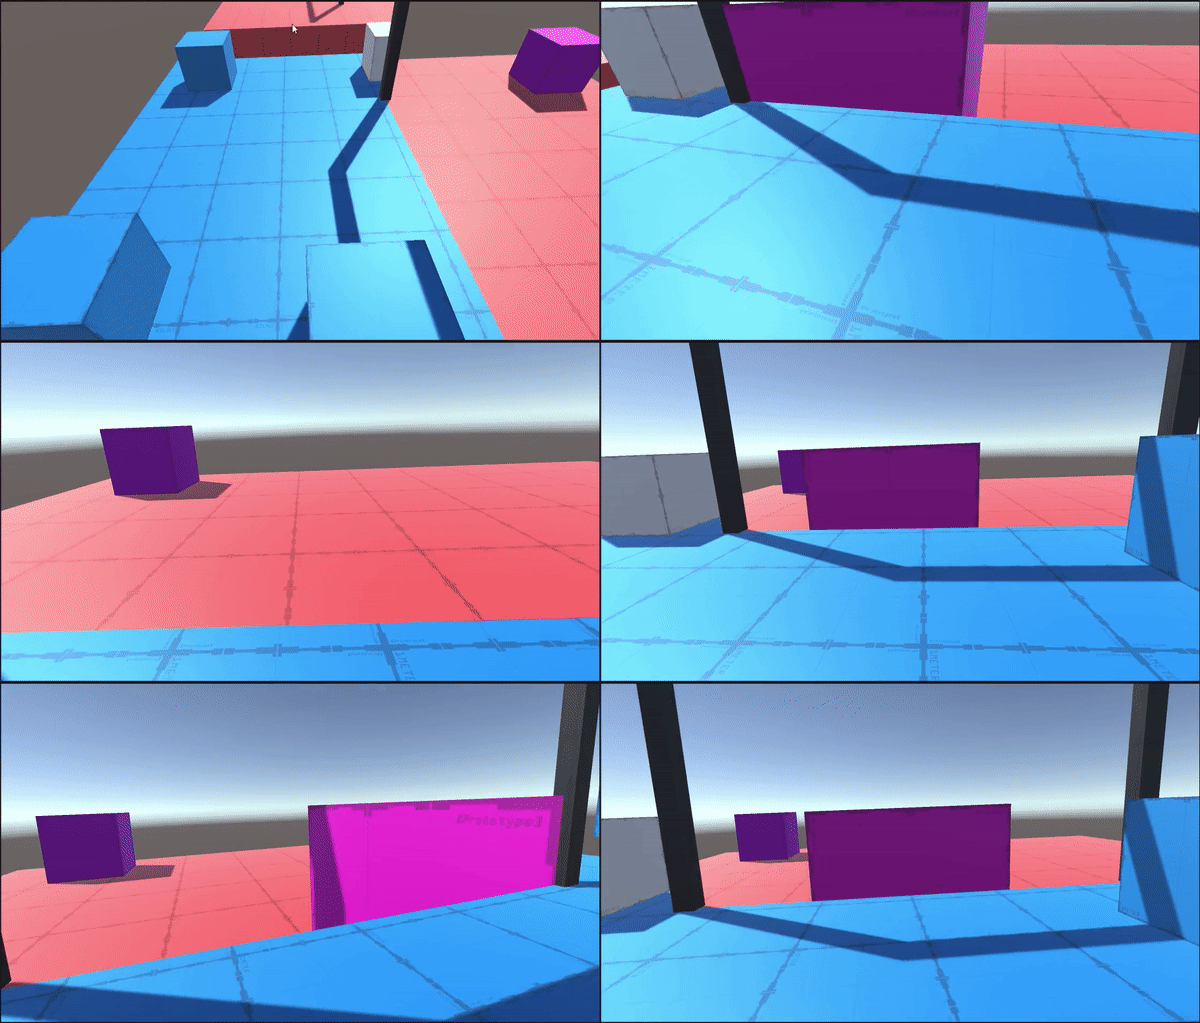
Portal Camera Near Plane Clipping
Since the portal camera follow’s the player’s position with respect to the portal, sometimes there are objects stands in between the camera and the portal screen, which results in the following rendering issue:
Conclusion
I have documented my process and approach of recreating the portal effect in this blog post. I hope that this would be useful in the future to other people or even myself. The entire Github project can be found here: https://github.com/sx2gavin/Portals.
Resources
- Sebastian Lague’s Coding Adventure: Portals: https://www.youtube.com/watch?v=cWpFZbjtSQg&t=2s
- World, View and Projection Matrix: http://www.codinglabs.net/article_world_view_projection_matrix.aspx
- The Perspective and Orthographic Projection Matrix: https://www.scratchapixel.com/lessons/3d-basic-rendering/perspective-and-orthographic-projection-matrix/projection-matrices-what-you-need-to-know-first
- Oblique View Frustum Depth Projection and Clipping: http://www.terathon.com/lengyel/Lengyel-Oblique.pdf